Hayman Reese Brake Controller Manual: A Comprehensive Guide
This manual provides detailed instructions for installing and operating Hayman Reese brake controllers, ensuring safe and effective trailer braking.
It covers various models, wiring, and troubleshooting steps for optimal performance.
Hayman Reese is a leading Australian manufacturer of towing and load restraint equipment, renowned for quality and innovation. Their brake controllers are designed to synchronize braking between your vehicle and trailer, crucial for safe towing.
These controllers offer features like proportional braking, time-delayed braking, and smart technology like Sync Control, found in the Smartclick series. Understanding your specific controller type is vital for correct installation and operation. A complete wiring harness, often sold separately, simplifies the connection process.
This guide will walk you through installation, wiring, and troubleshooting, ensuring your Hayman Reese brake controller functions optimally, providing peace of mind on every journey. Always prioritize safety and consult official resources for detailed information.
Understanding the Need for a Brake Controller
When towing a trailer, the vehicle’s braking system alone is often insufficient to stop safely, especially in emergencies. A brake controller addresses this by applying the trailer’s brakes in proportion to the vehicle’s braking force, or using a time-delayed system.
Without a controller, the trailer’s momentum can cause it to push against the vehicle, increasing stopping distances and potentially leading to loss of control. Hayman Reese controllers ensure synchronized braking, enhancing stability and reducing the risk of accidents.
Legal requirements often mandate the use of a brake controller when towing trailers exceeding a certain weight, varying by region. Proper installation and adjustment are critical for optimal performance and safety.
Hayman Reese Smartclick Brake Controller Overview
The Hayman Reese Smartclick brake controller is a compact and user-friendly device designed for modern towing needs. It features a simple, intuitive interface with LED indicators for easy monitoring of brake status and functionality.

This controller offers both proportional and time-delayed braking modes, allowing customization based on the trailer and driving conditions. The “Sync Control” feature optimizes braking performance, ensuring smooth and controlled stops.
A key benefit is its plug-and-play capability when used with the dedicated Hayman Reese wiring harness (sold separately), simplifying installation. It’s designed for ease of use and reliable performance, enhancing towing safety.
Types of Hayman Reese Brake Controllers
Hayman Reese offers a range of brake controllers to suit diverse towing requirements. Proportional brake controllers apply braking force in direct relation to the vehicle’s deceleration, providing smooth and controlled stopping. This type is ideal for trailers with electric brakes and offers a more natural braking feel.
Time-delayed brake controllers, conversely, activate the trailer brakes after a short delay, building braking force gradually. These are often used with trailers that require a more assertive braking action. Choosing the right type depends on the trailer’s weight, brake system, and the driver’s preference.
Proportional Brake Controllers
Proportional controllers from Hayman Reese represent a sophisticated approach to trailer braking. These units synchronize trailer brake force with the towing vehicle’s deceleration, delivering a smooth and controlled stopping experience. The braking intensity adjusts automatically based on how hard the driver presses the vehicle’s brake pedal.
This responsiveness is particularly beneficial for heavier trailers or those requiring precise control. Features like ‘Sync Control’ further enhance performance by optimizing brake application. Proportional controllers offer a more natural and comfortable towing experience, improving safety and reducing wear on both the vehicle and trailer brakes.
Time-Delayed Brake Controllers
Time-delayed brake controllers operate on a different principle than proportional models. These controllers apply a pre-set level of braking force after a short, adjustable delay following the driver’s brake pedal activation. The delay allows the towing vehicle to begin decelerating before the trailer brakes engage, preventing sudden jolts or instability.
While simpler in operation, time-delayed controllers are effective for lighter trailers or situations where precise synchronization isn’t critical. Adjustment of the delay and braking force is crucial for optimal performance. They represent a cost-effective solution for basic trailer braking needs, offering reliable stopping power with a straightforward setup.
Installation Process: General Considerations
Before commencing installation, carefully review the Hayman Reese brake controller manual and gather all necessary tools and wiring components. Ensure the vehicle is parked on a level surface with the ignition switched off. Disconnect the negative terminal of the vehicle’s battery to prevent electrical shorts during the wiring process.
Select a mounting location that is easily accessible to the driver, secure, and allows for unobstructed operation. Verify sufficient space behind the mounting surface for wiring connections. Always prioritize safety by using appropriate wiring connectors and ensuring all connections are properly insulated. A complete wiring harness simplifies installation and enhances reliability.
Wiring Diagrams and Color Codes
Accurate wiring is crucial for proper brake controller function. Hayman Reese utilizes a standardized color code for its controllers. The white wire is consistently used for grounding, connecting to the vehicle’s chassis. The blue wire transmits the trailer brake output signal. Violet/white typically connects to the brake on/off circuit, often the cold side of the stoplight switch.
Yellow/red provides the power supply, requiring a fused connection. Vehicle-specific diagrams are essential; for a Ford Ranger, blue may be black/green. Jeep Wranglers often use a dark green/white wire for the brake signal. Refer to the vehicle’s wiring schematics for precise identification.
Identifying Vehicle Wiring (Ford Ranger Example)
For 2019 Ford Rangers and Raptors, locating the correct wires is key. The white wire from the brake controller connects to the vehicle’s white (ground) wire. The blue wire, or sometimes black/green, serves as the trailer brake output. The violet/white wire connects to the red wire, representing the brake on/off signal, linked to the stoplight switch.
Power is supplied via the yellow/red wire, connecting to the vehicle’s black wire. Installation under the steering wheel allows for telescoping and tilt adjustment, maintaining functionality. Always verify wire colors with a vehicle wiring diagram before making connections to avoid errors.
Identifying Vehicle Wiring (Jeep Wrangler Example)
When installing on a Jeep Wrangler (JL/JLU), the brake signal wire is typically dark green/white. Power for the controller should be sourced from a 30A fused circuit or breaker, potentially utilizing a 40A auxiliary point with a swapped 30A fuse. Controller output connects to the blue wire within the Hayman Reese wiring harness, facilitating trailer brake activation.
Ensure proper fusing to protect the electrical system. Running a dedicated cable from the controller to the trailer harness is recommended. Carefully identify each wire before connecting, referencing a Jeep Wrangler wiring diagram for accuracy and safety during installation.
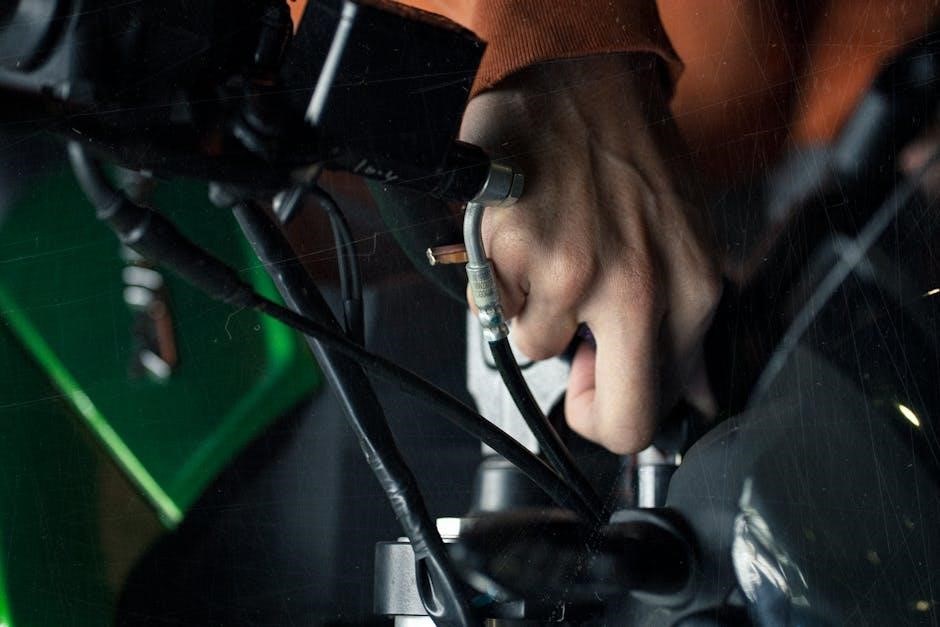
Wiring Connections: Step-by-Step Guide
Begin by securely connecting the white wire to a clean, unpainted metal surface for a reliable ground. Next, attach the blue wire to the trailer brake output, noting some Ford Rangers may utilize a black/green wire instead. Connect the violet/white wire to the red wire, representing the brake on/off function linked to the stoplight switch.
Finally, connect the yellow/red wire to the black wire for power. Double-check all connections for tightness and proper insulation. Refer to vehicle-specific wiring diagrams to confirm correct wire identification before proceeding. A secure and accurate wiring setup is crucial for safe operation.
Connecting the White Wire (Ground)
The white wire is dedicated to establishing a solid ground connection, vital for the brake controller’s functionality. Locate a clean, unpainted metal surface within the vehicle’s chassis – avoid painted or coated areas as they impede conductivity. Securely fasten the white wire using a suitable ring terminal and screw, ensuring a firm and corrosion-resistant connection.
A poor ground can cause erratic controller behavior or complete failure. Verify the connection’s integrity by testing for continuity with a multimeter. Proper grounding minimizes electrical interference and ensures reliable brake activation; This foundational step is critical for the entire system’s performance.
Connecting the Blue Wire (Trailer Brake Output)
The blue wire transmits the braking signal from the controller to the trailer’s electric brakes. Connect this wire to the blue wire within the Hayman Reese wiring harness, which leads directly to the trailer connector. On some Ford Rangers, this may be a black/green wire instead of blue – verify your vehicle’s wiring diagram.
Ensure a secure and insulated connection using butt connectors or a similar method. This wire carries a significant current during braking, so a robust connection is essential. Incorrect wiring here will prevent the trailer brakes from activating, compromising safety. Double-check the connection before proceeding.
Connecting the Violet/White Wire (Brake On/Off)
The violet/white wire functions as the brake on/off signal, often connected to the cold side of the vehicle’s stoplight switch. This wire indicates when the vehicle’s brakes are applied, activating the trailer brake controller. Connect it to the red wire on the Hayman Reese controller.
Proper connection ensures the trailer brakes engage simultaneously with the vehicle’s brakes. Verify the connection is secure and insulated to prevent shorts. Incorrect wiring can lead to erratic brake behavior or complete failure. Consult your vehicle’s wiring diagram for the precise location of the stoplight switch wire.
Connecting the Yellow/Red Wire (Power)
The yellow/red wire provides power to the Hayman Reese brake controller, requiring a connection to a reliable 12V source. Connect this wire to the black wire on the controller, ensuring it’s appropriately fused for safety – typically a 30A fuse or circuit breaker is recommended. Consider utilizing an auxiliary power point, swapping the existing fuse for a 30A equivalent if necessary.
A secure and properly fused connection is crucial for preventing electrical issues. Double-check the polarity before connecting. Insufficient power can cause the controller to malfunction, while an unfused connection poses a fire hazard.
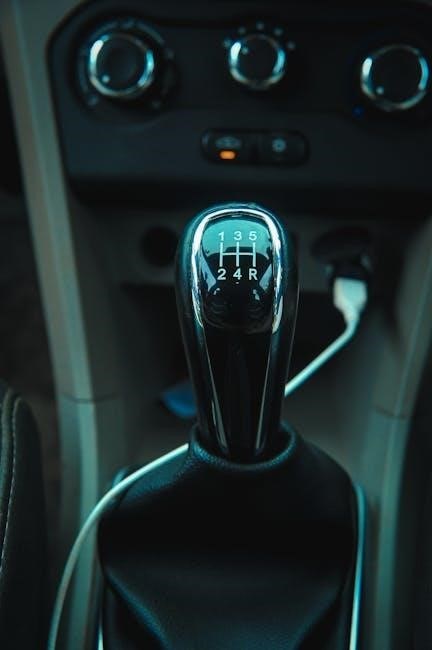
Mounting the Brake Controller
Proper mounting ensures the brake controller is secure, accessible, and doesn’t interfere with vehicle operation. Select a location easily reachable by the driver, ideally under the dashboard. Ensure the area behind the chosen mounting point is clear of obstructions, like wiring or mechanical components.
Use the mounting bracket as a template to mark the drill holes accurately. The unit must be mounted to a solid surface for stability. Avoid locations that impede steering wheel movement or legroom. Securely fasten the controller using appropriate screws, ensuring a firm and vibration-resistant installation.
Optimal Mounting Locations
The ideal mounting location for your Hayman Reese brake controller is within easy reach of the driver, typically below the dashboard. Consider a spot that doesn’t obstruct the steering wheel’s full range of motion, including telescoping and tilt adjustments. Ensure sufficient clearance for comfortable access to the control adjustments while driving.
Avoid areas prone to excessive vibration or direct sunlight. A location allowing for clear visibility of the LED indicators is also crucial. Prioritize accessibility without compromising driver safety or vehicle functionality. Carefully assess the space behind the dashboard panel before drilling, confirming no hidden wiring or components exist.
Securing the Unit to a Solid Surface
Robust mounting is essential for reliable operation. The unit must be firmly attached to a solid, stable surface to withstand vehicle vibrations and driving forces. Utilize the provided mounting bracket as a template to accurately mark the necessary hole locations. Ensure the chosen surface is free from loose materials or obstructions before drilling.
Employ appropriate screws or bolts designed for automotive interiors, guaranteeing a secure and lasting connection. Avoid over-tightening, which could damage the controller housing or the vehicle’s dashboard. Double-check the stability of the mounted unit, confirming it remains firmly in place with no wobble or movement.
Harness Installation
A dedicated wiring harness simplifies the installation process significantly, minimizing the need for individual wire connections. Hayman Reese offers complete wiring harnesses specifically designed for various vehicle makes and models, ensuring compatibility and a secure fit. If your vehicle isn’t pre-wired, purchasing a complete harness is often necessary.
The harness provides a plug-and-play connection to the brake controller, streamlining the electrical setup. Carefully route the harness along existing vehicle wiring paths, avoiding heat sources and moving parts. Secure the harness with cable ties to prevent chafing or damage. Always refer to the vehicle’s manual for specific wiring locations.
Hayman Reese Wiring Harness – Importance
Utilizing a Hayman Reese wiring harness is crucial for a reliable and safe brake controller installation. These harnesses are vehicle-specific, eliminating the guesswork of identifying and connecting individual wires. They ensure correct polarity and proper circuit protection, minimizing the risk of electrical damage. A dedicated harness significantly reduces installation time and complexity, even for those with limited electrical experience.
The harness provides a secure and weatherproof connection, preventing corrosion and maintaining optimal performance. It’s particularly important if your vehicle didn’t come pre-wired for a trailer brake controller. Investing in a quality harness safeguards your vehicle’s electrical system and ensures the brake controller functions as intended.
Purchasing a Complete Wiring Harness
A complete Hayman Reese wiring harness is often sold separately and is essential for a streamlined installation, particularly if your vehicle isn’t pre-wired. These harnesses are designed for specific vehicle makes and models, guaranteeing compatibility and a plug-and-play connection with the Smartclick brake controller. Sources like Caravans Plus offer these harnesses, ensuring genuine Hayman Reese quality.
When purchasing, verify the harness matches your exact vehicle year and model. Consider the harness a vital component, not an optional extra, for a professional and safe outcome. Avoid generic harnesses as they may require extensive modification and compromise safety. A complete harness simplifies the process and minimizes potential wiring errors.
LED Indicator Functionality

The Hayman Reese brake controller utilizes LED indicators to communicate system status. Understanding these lights is crucial for diagnosing operation and identifying potential issues. Typically, a solid green LED signifies the controller is powered on and functioning correctly, with no trailer faults detected. A flashing red LED indicates a trailer fault, such as a disconnected wire or blown bulb, requiring immediate attention.
The LED may also illuminate during braking, confirming the controller is actively sending a signal to the trailer brakes. Refer to the specific model’s documentation for detailed interpretations of LED patterns. Regularly checking the LED indicators during pre-trip inspections ensures a safe towing experience.
Sync Control Features
Hayman Reese’s Sync Control technology offers a user-friendly method for calibrating the brake controller to your specific vehicle and trailer combination. This feature streamlines the setup process, ensuring optimal braking performance tailored to your load. Sync Control automatically adjusts the controller’s sensitivity, minimizing the need for manual adjustments.
The system learns the braking characteristics of your vehicle, providing smoother and more consistent trailer braking. Activation typically involves a simple sequence of pressing and releasing the vehicle’s brakes and the controller’s adjustment buttons. Consult your model’s manual for precise Sync Control instructions and ensure a complete wiring harness is used.
Troubleshooting Common Issues
If the controller isn’t responding, first check the power connection (yellow/red wire) and ground (white wire) for secure attachment and proper voltage. Verify the fuse associated with the controller’s power supply hasn’t blown. If trailer brakes aren’t activating, confirm the blue wire connection to the trailer brake output is secure.
Inspect the trailer’s brake wiring and magnets for faults. A lack of brake signal (violet/white wire) can also cause issues; ensure the vehicle’s brake lights are functioning correctly. Refer to the wiring diagrams for your vehicle and controller to pinpoint connection errors. If problems persist, consult a qualified auto electrician.
Controller Not Responding
If your Hayman Reese brake controller fails to power on, begin by verifying the primary power connection. Ensure the yellow/red wire is securely connected to a 12V power source, ideally with a fuse. Check the fuse itself to confirm it hasn’t blown due to a surge or short circuit. A faulty ground connection (white wire) is another common culprit; inspect for corrosion or looseness.
Confirm the vehicle’s ignition is switched on, as some controllers require this to operate. If the issue persists, temporarily bypass the existing wiring with a known-good jumper wire to isolate potential wiring faults within the vehicle.
Trailer Brakes Not Activating
If the controller displays activity but the trailer brakes aren’t engaging, first verify the connection to the trailer. Inspect the blue wire connection at both the controller and the trailer harness for corrosion or damage. Ensure the trailer’s brake magnets or electric brakes are functioning correctly – test them independently. Confirm proper voltage is reaching the blue wire when the brakes are applied; a multimeter is essential for this check.
Check the brake gain setting on the controller; it may be set too low to activate the trailer brakes effectively. Verify the violet/white wire is correctly connected to the brake light switch, signaling brake application.
Safety Precautions During Installation
Prioritize safety throughout the installation process. Disconnect the vehicle’s negative battery terminal to prevent accidental shorts and electrical damage. Exercise caution when drilling into the vehicle’s body; locate and avoid existing wiring and components. Use appropriate safety glasses and gloves during wiring and mounting procedures. Ensure the mounting location is secure and doesn’t interfere with driving controls.
Double-check all wiring connections before reconnecting the battery. Avoid sharp bends or kinks in the wiring harness. If unsure about any step, consult a qualified automotive electrician. Always refer to the vehicle’s owner’s manual for specific wiring diagrams and safety recommendations.
Post-Installation Testing and Adjustment
After installation, thoroughly test the brake controller’s functionality. Reconnect the vehicle’s battery and verify the LED indicators illuminate correctly. Perform a static test by manually activating the trailer brakes with the controller, ensuring the trailer brakes engage firmly. Conduct a road test in a safe, open area, gradually applying the vehicle brakes to confirm proportional braking action.
Adjust the controller’s sensitivity as needed to match the trailer’s weight and braking characteristics. Monitor for any erratic behavior or unusual noises during braking. Refer to the controller’s manual for specific adjustment procedures and troubleshooting tips. Regularly inspect wiring and connections for wear or damage.
Resources and Further Information
For comprehensive support and detailed product information, visit the Hayman Reese Official Website. This site offers downloadable manuals, wiring diagrams, and frequently asked questions. Caravans Plus Website provides a range of Hayman Reese products and accessories, including complete wiring harnesses (Part No: HAYMAN EESE GUARDIAN).
Access installation instructions directly at www.haymanreese.com.au/wiringinstructions. Consult qualified automotive electricians for complex wiring scenarios or if you encounter difficulties. Always prioritize safety and adhere to local regulations when installing and operating your brake controller. Remember a complete wiring harness is often sold separately.

Hayman Reese Official Website
The Hayman Reese official website, www.haymanreese.com.au, serves as a central hub for all product-related resources. Here, you can find detailed product specifications, downloadable instruction manuals, and crucial wiring diagrams for various vehicle makes and models. Access comprehensive installation guides, including step-by-step instructions and visual aids, to ensure a successful setup.
Explore a dedicated FAQ section addressing common queries and troubleshooting tips. Download the latest software updates for compatible brake controllers to optimize performance. Locate authorized dealers and service centers near you for professional assistance. The website also provides access to wiring instructions directly at www.haymanreese.com.au/wiringinstructions.

Caravans Plus Website
Caravans Plus, accessible at www.caravansplus.com.au, is a valuable resource for Hayman Reese products and support. This website offers a wide range of Hayman Reese brake controllers and related accessories, allowing you to browse and purchase the components needed for your setup. Find detailed product descriptions and specifications to ensure compatibility with your vehicle and trailer.
Explore informative articles and guides on trailer braking systems and safety. Access the Hayman Reese Guardian product information, including features and benefits. Caravans Plus provides a convenient platform to research and compare different brake controller options. Benefit from their expertise and customer support to make informed decisions about your towing setup.